
آموزش طراحی یک پروژه MVC با jQuery UI
بسم الله الرحمن الرحیم
آموزش Entitiy Framework و Jquery
Code First & EF
در این مقاله قصد داریم به صورت خیلی ساده و سریع عملیات های CRUD (Create, Read, Update, Delete) را با استفاده از jQuery و Entity Framework code firstانجام دهیم.
کد پروژه را می توانید در پایان مقاله دانلود کنید.
ابتدا باید table خود را به صورت Code First طراحی کنیم.
اگر با Entity Framework و Code First و یا Migration ها آشنایی ندارید می توانید از مقالات زیر استفاده کنید.
دوره آموزشی Entity Framework و Code First
     public class User
    {
    public int UserID { get; set; }
    [Required(ErrorMessage = "Please Enter Your Name")]
    public string Name { get; set; }
    [Required(ErrorMessage = "Please Enter Your Address")]
    public string Address { get; set; }
    [Required(ErrorMessage = "Please Enter Your Contact No")]
    public string ContactNo { get; set; }
    }

    public class DataContext : DbContext
    {
    public DataContext()
    : base("DefaultConnection")
    {

    }

    public DbSet<User> Users { get; set; }
    }
ساخت CRUD
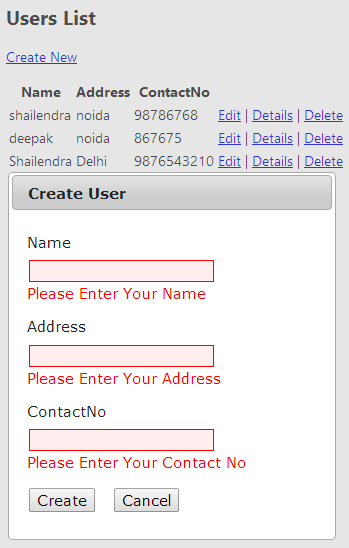
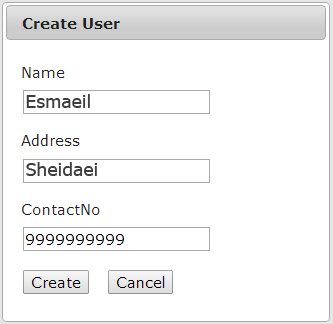
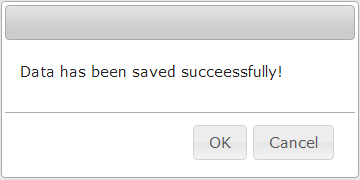
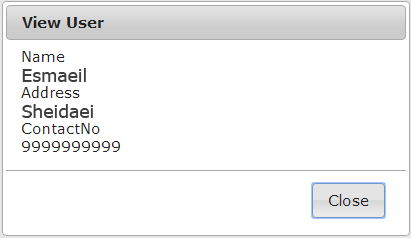
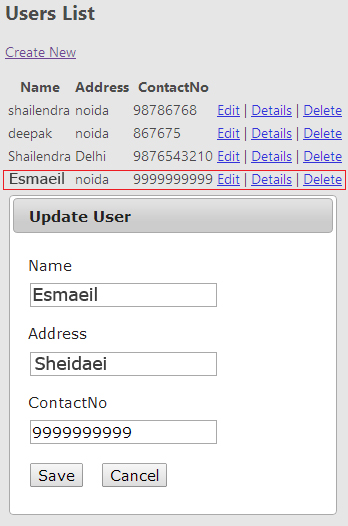
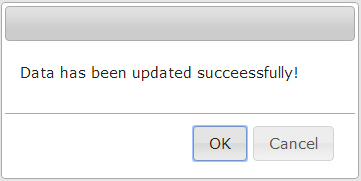
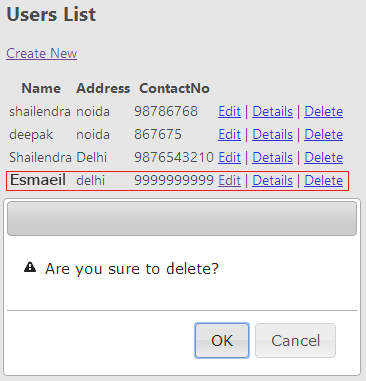
می خواهیم یک پروژه با UI زیر ایجاد کنیم.
Create
Read
Update
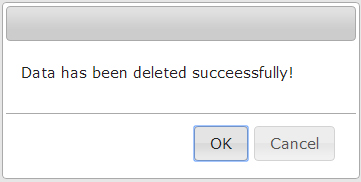
Delete
کدهای ما برای ساخت UI به صورت زیر خواهد بود
     @model IEnumerable<jQuery_CRUD.DAL.User>
    @{
    ViewBag.Title = "Index";
    }
    <script src="~/Scripts/jquery-1.8.2.min.js"></script>
    <script src="~/Scripts/jquery-ui-1.8.24.min.js"></script>
    <link href="~/Content/themes/base/jquery-ui.css" rel="stylesheet" />
    <script>
    $(document).ready(function () {
    var url = "";
    $("#dialog-alert").dialog({
    autoOpen: false,
    resizable: false,
    height: 170,
    width: 350,
    show: { effect: 'drop', direction: "up" },
    modal: true,
    draggable: true,
    open: function (event, ui) {
    $(".ui-dialog-titlebar-close").hide();
    },
    buttons: {
    "OK": function () {
    $(this).dialog("close");

    },
    "Cancel": function () {
    $(this).dialog("close");
    }
    }
    });

    if ('@TempData["msg"]' != "") {
    $("#dialog-alert").dialog('open');
    }

    $("#dialog-edit").dialog({
    title: 'Create User',
    autoOpen: false,
    resizable: false,
    width: 400,
    show: { effect: 'drop', direction: "up" },
    modal: true,
    draggable: true,
    open: function (event, ui) {
    $(".ui-dialog-titlebar-close").hide();
    $(this).load(url);
    }
    });

    $("#dialog-confirm").dialog({
    autoOpen: false,
    resizable: false,
    height: 170,
    width: 350,
    show: { effect: 'drop', direction: "up" },
    modal: true,
    draggable: true,
    open: function (event, ui) {
    $(".ui-dialog-titlebar-close").hide();

    },
    buttons: {
    "OK": function () {
    $(this).dialog("close");
    window.location.href = url;
    },
    "Cancel": function () {
    $(this).dialog("close");
    }
    }
    });

    $("#dialog-detail").dialog({
    title: 'View User',
    autoOpen: false,
    resizable: false,
    width: 400,
    show: { effect: 'drop', direction: "up" },
    modal: true,
    draggable: true,
    open: function (event, ui) {
    $(".ui-dialog-titlebar-close").hide();
    $(this).load(url);
    },
    buttons: {
    "Close": function () {
    $(this).dialog("close");
    }
    }
    });

    $("#lnkCreate").live("click", function (e) {
    //e.preventDefault(); //use this or return false
    url = $(this).attr('href');
    $("#dialog-edit").dialog('open');

    return false;
    });

    $(".lnkEdit").live("click", function (e) {
    // e.preventDefault(); use this or return false
    url = $(this).attr('href');
    $(".ui-dialog-title").html("Update User");
    $("#dialog-edit").dialog('open');

    return false;
    });

    $(".lnkDelete").live("click", function (e) {
    // e.preventDefault(); use this or return false
    url = $(this).attr('href');
    $("#dialog-confirm").dialog('open');

    return false;
    });

    $(".lnkDetail").live("click", function (e) {
    // e.preventDefault(); use this or return false
    url = $(this).attr('href');
    $("#dialog-detail").dialog('open');

    return false;
    });

    $("#btncancel").live("click", function (e) {
    $("#dialog-edit").dialog("close");
    return false;
    });
    });
    </script>
    <div id="dialog-alert" style="display: none">
    <p>
    @TempData["msg"]!
    </p>
    </div>

    <div id="dialog-confirm" style="display: none">
    <p>
    <span class="ui-icon ui-icon-alert" style="float: left; margin: 0 7px 20px 0;"></span>
    Are you sure to delete?
    </p>
    </div>

    <div id="dialog-edit" style="display: none">
    </div>
    <div id="dialog-detail" style="display: none">
    </div>

    <h2>Users List</h2>

    <p>
    @Html.ActionLink("Create New", "Create", null, new { id = "lnkCreate" })
    </p>
    <table>
    <tr>
    <th>
    @Html.DisplayNameFor(model => model.Name)
    </th>
    <th>
    @Html.DisplayNameFor(model => model.Address)
    </th>
    <th>
    @Html.DisplayNameFor(model => model.ContactNo)
    </th>
    <th></th>
    </tr>

    @foreach (var item in Model)
    {
    <tr>
    <td>
    @Html.DisplayFor(modelItem => item.Name)
    </td>
    <td>
    @Html.DisplayFor(modelItem => item.Address)
    </td>
    <td>
    @Html.DisplayFor(modelItem => item.ContactNo)
    </td>
    <td>
    @Html.ActionLink("Edit", "Edit", new { id = item.UserID }, new { @class = "lnkEdit" }) |
    @Html.ActionLink("Details", "Details", new { id = item.UserID }, new { @class = "lnkDetail" }) |
    @Html.ActionLink("Delete", "Delete", new { id = item.UserID }, new { @class = "lnkDelete" })
    </td>
    </tr>
    }

    </table>
کدهای ما برای کنترل بخش UI در کنترلر به صورت زیر خواهد بود.
     public class UserController : Controller
    {
    private DataContext db = new DataContext();

    // GET: /User/
    public ActionResult Index()
    {
    return View(db.Users.ToList());
    }

    // GET: /User/Details/5
    public ActionResult Details(int id = 0)
    {
    User user = db.Users.Find(id);
    if (user == null)
    {
    return HttpNotFound();
    }
    return View(user);
    }

    // GET: /User/Create
    public ActionResult Create()
    {
    return PartialView();
    }

    // POST: /User/Create
    [HttpPost]
    [ValidateAntiForgeryToken]
    public ActionResult Create(User user, string Command)
    {
    if (ModelState.IsValid)
    {
    db.Users.Add(user);
    db.SaveChanges();
    TempData["Msg"] = "Data has been saved succeessfully";
    return RedirectToAction("Index");
    }

    return View(user);
    }

    // GET: /User/Edit/5
    public ActionResult Edit(int id = 0)
    {
    User user = db.Users.Find(id);
    if (user == null)
    {
    return HttpNotFound();
    }
    return View(user);
    }

    // POST: /User/Edit/5
    [HttpPost]
    [ValidateAntiForgeryToken]
    public ActionResult Edit(User user)
    {
    if (ModelState.IsValid)
    {
    db.Entry(user).State = EntityState.Modified;
    db.SaveChanges();
    TempData["Msg"] = "Data has been updated succeessfully";
    return RedirectToAction("Index");
    }
    return View(user);
    }

    // GET: /User/Delete/5
    public ActionResult Delete(int id)
    {
    User user = db.Users.Find(id);
    db.Users.Remove(user);
    db.SaveChanges();
    TempData["Msg"] = "Data has been deleted succeessfully";
    return RedirectToAction("Index");
    }

    protected override void Dispose(bool disposing)
    {
    db.Dispose();
    base.Dispose(disposing);
    }
    }
دانلود کد پروژه Entity framework & Code first - jQuery

محمد رضا
سلام ممنون
آقای شیدایی محترم این بحث CodeFirst به همین صورته که مثلا کلاس Student برای ارث بری از User باید یک Property به صورت Virtual از User داشته باشه پس بحث ارث برای به صورت شی گرایی چطور میشه. مثلا من اگر یک کلاس دیگه به اسم Teacher داشته باشم که نمیشه اینطوری من اجبار نکردم که User هم حتما هم Student باشه هم Teacher؟
ببخشید میدونم که سوالم خیلی LowLevel ممنون میشم کمک کنید.آخه من 1 سری کلاس به همین صورت که عرض کردم طراحی کردم که توی یک View هر دو Student و Teacher ثبت نام می کنن ولی توی Controller مربوط نمیدونم شی از کدوم کلاس دریافت کنم تا بتونم اطلاعات کاربر هارو وارد پایگاه داده کنم البته باید بگم من 1 کلاس ViewModel هم دارم که توشون یک شی از هر کلاس تعریف شده.وقتی ورودی Action عضویت را از نوع کلاس ViewModel هم تعریف میکنم باز هم امکان تفکیک اعضا وجود ندارد.
می خوام لطف کنید و راهنمایی کنید که اصلا کار من درسته که اطلاعات ثبت نام اشخاص تو یک View دریافت بشه؟
اسماعیلشیدایی
با سلام خدمت شما
در خصوص سوال شما باید عرض کنم که شما می توانید با استفاده از روش های تزریق وابستگی مشکل Object oriented را می توان به سادگی برطرف نمود.
برای مطالعه در خصوص تزریق وابستگی لطفا از این مقالات که قبلا توضیح داده ایم استفاده کنید.
به چندین روش می توانید مشکلتان را برطرف کنید در ساده ترین روش کافی است که شما فیلدی را برای تعیین این اطلاعات ثبت کنید و همانطور که خودتان نیز فرمودید viewModel های متفاوتی داشته باشید و برای جلوگیری از تکرار کدها Partial هایی ایجاد کنید تا برای ثبت اطلاعات از یک کد واحد استفاده کنید.
فرامرزی
سلام وقتتون بخیر
اسماعیلشیدایی
ممنون از لطف شما